SaaS stands for Software as a Service. It means software that people use by paying for it monthly or yearly. Examples are tools like Canva, Notion, or Zoom. If you are building a SaaS app, you will need to accept payments from your users. This is where billing integration comes in.
As a developer, you can’t just build a great app you also need to make sure people can pay for it easily and securely. If you’re learning in full stack developer classes, understanding how to set up payment systems is an important skill.
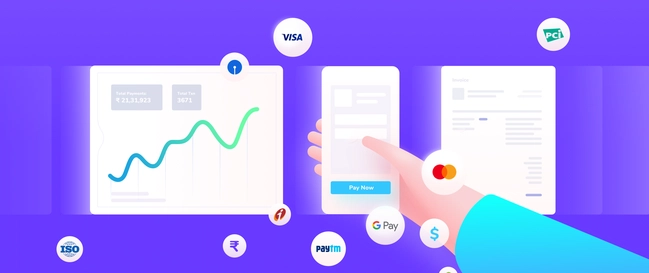
In this blog, we’ll explain billing integrations in the simplest way. We will talk about tools like Stripe, Razorpay, and others. We’ll also show you how to connect them to your full stack app, what features they offer, and how to keep everything secure.
What Is SaaS Billing Integration?
SaaS billing integration means adding payment features to your web app. It lets users:
- Buy subscriptions (monthly/yearly)
- Use credit/debit cards or digital wallets
- Get invoices and payment receipts
- Cancel or change their plan
- Pay securely and easily
Billing integration also helps the app owner:
- Track who paid and when
- Manage plans and prices
- Offer free trials and discounts
- Automate renewal reminders
Common Tools for SaaS Billing
Here are the most popular tools developers use for payment:
1. Stripe
- Based in the USA, used worldwide
- Easy to use, clean API
- Supports cards, wallets, bank transfers
- Good for international users
- Has tools for subscriptions, invoices, coupons
2. Razorpay
- Popular in India
- Supports UPI, wallets, cards, and net banking
- Easy to set up for Indian customers
- Provides dashboard and reports
- Supports one-time and recurring payments
3. PayPal
- Trusted by many users
- Can be added with a button or API
- Not the best for full control over subscriptions
- Still good for quick setups
4. Paddle and Chargebee
- All-in-one billing solutions
- Handle taxes (like VAT, GST)
- Help with subscriptions and analytics
- Great for growing SaaS businesses
What a Full Stack Dev Needs to Do
As a full stack developer, your job is to connect the frontend (user side) and backend (server side) with the payment system.
You will need to:
- Create pricing pages
- Show plans (like Basic, Pro, or Enterprise)
- Take payment using secure forms
- Receive payment success or failure messages
- Save user data in the database
- Lock or unlock features based on the plan
- Send emails after payment
Key Features in a SaaS Billing System
1. Subscription Plans
Let users choose from different plans. Example:
- Free: Limited features
- Pro: ₹499/month
- Team: ₹1499/month
Each plan has its own features and limits.
2. Payment Methods
Let users pay using:
- Credit/debit cards
- UPI
- Wallets (Paytm, Google Pay)
- Net banking (for Razorpay)
- Apple Pay / Google Pay (for Stripe)
3. Invoices and Receipts
Automatically send users:
- Invoices for every payment
- Receipts via email
- Notifications if payment fails
4. Cancel/Upgrade Options
Let users:
- Cancel their plan
- Upgrade to a higher plan
- Downgrade when needed
- See their billing history
5. Webhooks
A webhook is a message sent by the payment system to your server when something happens (like payment success or failure). Your backend must listen to this and act.
Example:
When Stripe says payment is complete, your backend upgrades the user’s plan in your database.
Building a Simple Billing System: Step-by-Step
Let’s say you are building a simple SaaS app where users can upgrade to “Pro” for ₹499/month.
Step 1: Create Plans in Stripe or Razorpay
Go to the dashboard of Stripe or Razorpay:
- Add a product (e.g., “Pro Plan”)
- Set price and billing cycle (monthly or yearly)
- Save the product ID
Step 2: Set Up the Frontend
Use React or plain HTML/CSS to show pricing options. Add a “Buy Now” button.
When a user clicks the button, send them to the payment page (Stripe Checkout or Razorpay modal).
Example with Stripe:
const stripe = await loadStripe(‘your-public-key’);
stripe.redirectToCheckout({
sessionId: ‘your-session-id’,
});
Step 3: Set Up the Backend
Use Node.js with Express:
- Create an API to start a payment session
- Use Stripe or Razorpay SDK to create a checkout session
- Send session ID to the frontend
Example with Stripe:
const session = await stripe.checkout.sessions.create({
payment_method_types: [‘card’],
line_items: [
{
price: ‘price_id’,
quantity: 1,
},
],
mode: ‘subscription’,
success_url: ‘https://yourapp.com/success’,
cancel_url: ‘https://yourapp.com/cancel’,
});
Step 4: Handle Webhooks
Create an endpoint to receive updates:
- If payment is successful, mark user as “Pro”
- If payment fails, send reminder or lock features
Security Tips
- Never expose secret API keys in frontend
- Use HTTPS always
- Store billing info securely (or let Stripe/Razorpay store it)
- Validate webhook messages to avoid fake calls
- Use retry logic if a webhook fails
SaaS Billing for Indian Developers
If your users are in India, Razorpay is the best choice because it supports:
- UPI
- Indian wallets
- Net banking
- Indian GST rules
Stripe also works in India but may not support UPI directly. You can use both together if you have international and Indian users.
Real-World SaaS Billing Features
1. Free Trial
Let users try the app for 7 or 14 days for free. After that, ask them to subscribe.
Stripe and Razorpay both support free trials.
2. Coupon Codes
Give discounts to users. Example: “Get 20% off for first 3 months”
Create coupons in Stripe or Razorpay dashboard.
3. Dunning
If a payment fails (like a declined card), send email reminders. Try to charge again later.
Stripe handles this with smart retry logic.
4. Analytics
Track:
- Monthly Recurring Revenue (MRR)
- Churn rate (how many users cancel)
- Active subscriptions
- Total revenue
Use Stripe’s dashboard or connect Chargebee/Paddle for advanced analytics.
Challenges Developers Face
- Testing payments without charging real money
- Handling payment failures and retries
- Setting up taxes (like GST or VAT)
- Managing refunds and cancellations
- Syncing subscription status correctly
Don’t worry Stripe and Razorpay offer test modes and good documentation to help you learn and test safely.
Tips for Full Stack Developers
- Start simple: One plan, one payment method
- Use test environments before going live
- Use real-world projects to practice
- Try Stripe if your app is international
- Use Razorpay for Indian billing
- Learn about webhooks early
- Read official docs and build a mini-project
Final Thoughts
SaaS billing may sound difficult at first, but with the right tools, it becomes easy and powerful. You can offer free trials, subscriptions, invoices, and secure payments in your app with just a few lines of code.
If you’re enrolled in a full stack developer course in Hyderabad, working on billing integration is a great way to apply what you’ve learned. It includes frontend (UI), backend (APIs), databases (user records), and external tools (Stripe or Razorpay). You’ll also learn about real-world needs like payment security and user experience.
So go ahead build your own SaaS app, add payment features, and turn your code into a real product. It’s one of the best ways to grow as a full stack developer.
Happy coding and happy billing!
Contact Us:
Name: ExcelR – Full Stack Developer Course in Hyderabad
Address: Unispace Building, 4th-floor Plot No.47 48,49, 2, Street Number 1, Patrika Nagar, Madhapur, Hyderabad, Telangana 500081
Phone: 087924 83183